What are we trying to solve?
In my previous blog post, we discussed setting up the Heroku pipeline with a Ruby on Rails application to provide us with a local test environment, a staging server, and a production server. While this works great for ensuring we properly test our application before releasing it on the world, it has one major flaw. Heroku does not provide a great interface for maintaining a repository in a multi-developer environment. Heroku does not provide a good interface for handling pull requests, linking commits to issues in an issue tracker system (JIRA), or even a good branch history visualization tool.
Bitbucket
Bitbucket Cloud is a service for hosting Git repositories. It is a popular competitor to Github, owned by Atlassian. Bitbucket offers integration with Jira and Confluence to better support software development, branch management, and issue tracking. Bitbucket is the service we use internally.
What is a pipeline?
For the purposes of this blog post, we are only discussing pipelines in the context of Continuous Integration/Continuous Deployment. A pipeline is essentially a script for automating software deployment tasks. Your pipeline can automate executing unit testing, running environment set-up tasks, and deployment of your end-product to another server.
Pipeline Flow
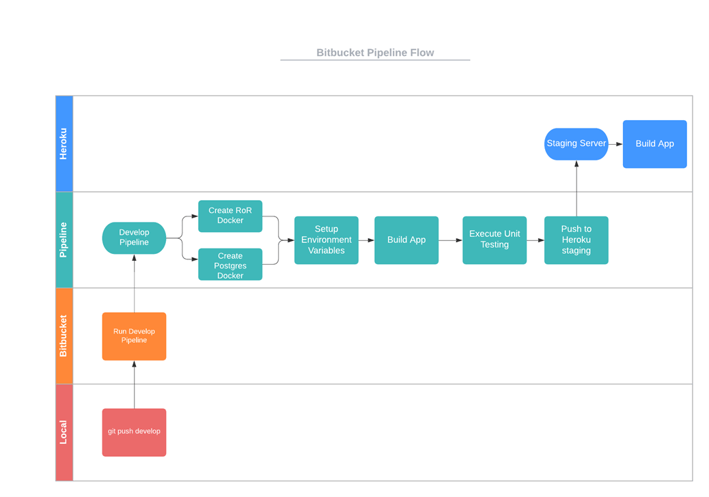
Figure 1- Visualizing Software Flow
Figure 1 shows a swimlane diagram describing the order of operations we want to occur. First, a developer will push a commit to the develop branch on Bitbucket, triggering the execution of our pipeline. During execution, we’ll set up docker images for Ruby on Rails and Postgres, build our application, run our unit tests, and finally push the code to Heroku for a final build and deploy.
Configuring the Pipeline
Bitbucket pipelines are defined through a YAML file named “bitbucket-pipelines.yml”. When you push your repository to Bitbucket, Bitbucket will automatically check for the YAML file and begin executing the steps described in that file.
Designing the YAML File
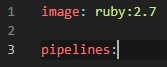
Bitbucket offers great documentation on configuring a YAML file. To start, there are two top level objects that must be defined:
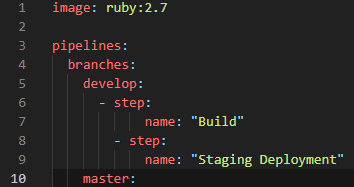
- Image – the image to use, in our case ruby:2.7
- Pipelines – A set of pipelines for specific triggers (branches, tags, pull requests, etc.)
For the workflow in Figure 1, let’s focus only on pipelines for branches. So let’s tell bitbucket to set up a pipeline for the develop and master branches.
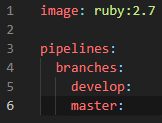
Let’s focus on the develop branch, and define some pipeline steps for building our application and pushing it to Heroku.
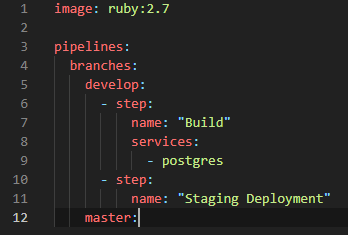
To build and test my application, I need a postgres database. So let’s inform bitbucket, using the services tag.
Great! Now we need to provide the script tag. This tag defines the list of CLI commands to run. We’ll use the CLI to build our application, configure our test database, and execute our unit tests (RSpec for our Ruby on Rails application).
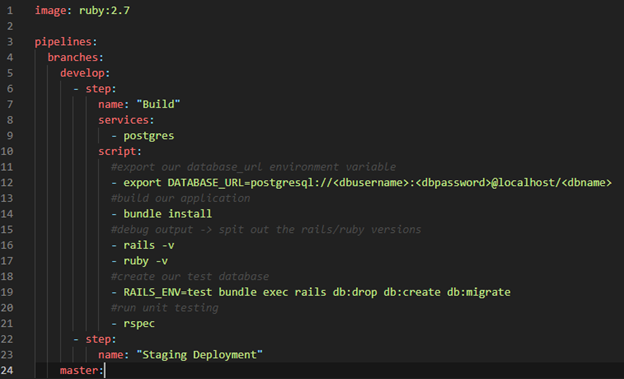
The above pipeline configuration does all the build and testing. Now it’s time to define the staging deployment step. This step will be much easier, a simple push to the Heroku repository.

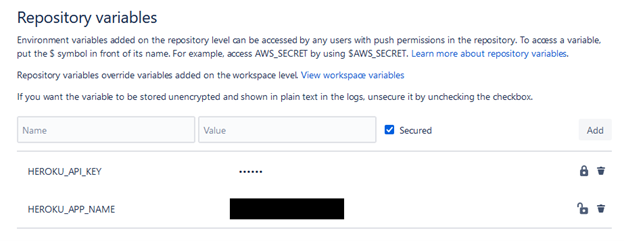
Wait… what’s “$HEROKU_API_KEY”?
This is a repository variable. In Bitbucket, navigate to:
Repository Settings > Repository Variables
Once there, you’ll see a menu for providing Key/Value pairs:
How do I get my HEROKU_API_KEY?
Heroku provides a nice command line option for generating an API key. Open up a bash/cmd prompt and type:
heroku authorizations:create
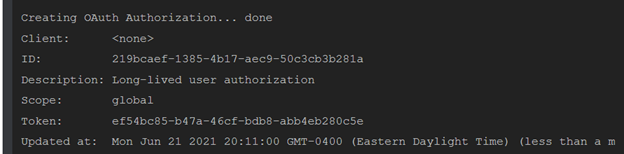
You will see the above output. The UUID labeled “Token” is your API key. Copy that and paste it into your repository variables with the name “HEROKU_API_KEY”.
Executing Our Pipeline
Now that the pipeline is configured, add the bitbucket_pipelines.yml to your commit and push the commit to your bitbucket develop branch.
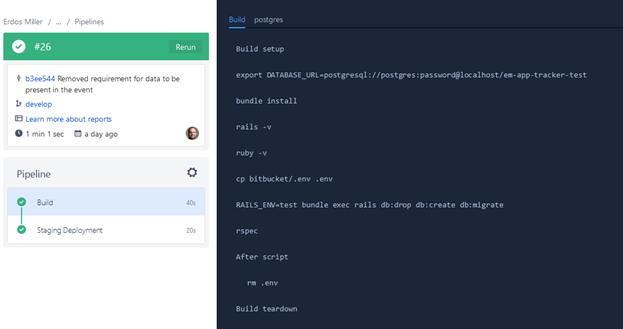
Bitbucket will automatically begin executing your pipeline. Navigate to Bitbucket and click on the Pipelines menu to see a list of previous and currently executing pipelines.
From there, you can click on an actively running pipeline to get a live view of the pipeline executing.
Summing It up
Pipelines provide a very easy way to execute common tasks in response to developer actions. Our script provides a way to execute our unit testing (ensuring that no code ever hits our staging server without passing our tests) and deploy our code to our staging server.
This is not the limit for pipelines. You can set up pipelines to respond to pull requests from developers, build installers for your desktop software, upload files to dropbox, and interact with may other services.