Integrating LabVIEW and C# 1
This article is intended to go over the very basics of integrating C# with LabVIEW. In this article we’ll go over creating a very basic C# class, compiling a DLL, and accessing that class from LabVIEW. We’ll be using Visual Studio 2010 and LabVIEW 2010 on Windows 7.
You can access all of the code for LabVIEW and Visual Studio in the following GitHub repository: https://github.com/erdosmiller/lvcstut1
Creating a DLL in Visual Studio
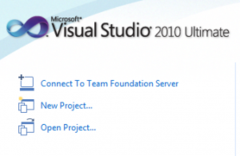
Open Visual Studio 2010 and create a new project. We want a Visual C# Console Application (or class library.)
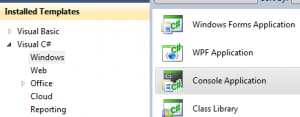
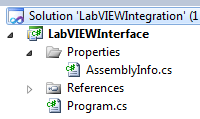
Rename the project to “LabVIEWInterface” and the Solution to “LabVIEWIntegration.
”
Edit your assembly info so that the version of the library automatically increments with each build. This will help when interfacing the DLL to LabVIEW as it will be able to detect the change. Modify your AssemblyInfo.cs to look like this at the end.

It’s also a good idea to fill out the general information. Here’s ours.
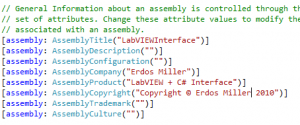
We don’t need “Program.cs,” so let’s go ahead and delete it. Your solution should now look like this.

We want the output of our project to be a DLL and not an EXE, so we need to modify the project settings. Right click on the project to access it’s properties. Change the “Output Type” to “Class Library.” Also, as of this writing, LabVIEW 2010 is not compatible with the .NET 4 run-time, so we’ll need to change our target framework to .NET 3.5. We also want to change our Assembly Name and Default Namespace. Change the Assembly Name and Default Namespace to be “LabVIEWInterface.” When you save your settings, it may warn you, but you can ignore it.

Now let’s add our class. Right-click on the project, scroll to “Add” and choose class. In the “Add New Item” menu, choose Class and hit “Add.” You’ll notice a new class was created with the default namespace we specified. Now try and build your project. Right-click on the project and select “Open Folder in Windows Explorer.” Then browse to “bin/Debug.” You should see the compiled DLL, “LabVIEWInterface.dll.”


Now let’s make our class do something useful; we’ll add our a cosine function. Modify your code to look like this. Also, rename your class file to “MyMath.cs” and build the project again.

If your build was successful, then you’re ready to move on to the LabVIEW portion of the tutorial.
Calling the DLL from LabVIEW
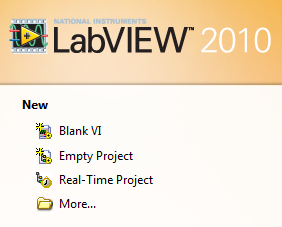
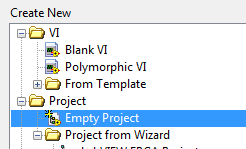
Open LabVIEW 2010 and create a new empty project, save that project somewhere in your workspace as “CSInterface.lvproj.”
Let’s retrieve our DLL from visual studio. Go back to Visual Studio, and right click on your project. Choose “Open Folder in Windows Explorer” and browse to “bin/Debug.” Copy “LabVIEWInterface.dll” to where you saved your LabVIEW project.
Now add the DLL to your LabVIEW project. Right click on “My Computer” in the LabVIEW project, choose “Add” and then “File.” Browse and select the DLL.

Now let’s create a blank VI. Right click on “My Computer” and select “New” and then “VI.” When the VI opens, save it in the same directory as the DLL as “CSInterface.vi”
Now let’s call our DLL, open the block diagram and right click. Expand to the full function menu, and browse to “Connectivity and then “.NET.” Pin the .NET palette to the screen.

The first thing we need to do to interface to our class is instantiate an instance. Place a .NET “Constructor Node” on the block diagram. When you place the node on the block diagram, you’ll be presented with a menu, by default it shows you DLLs that LabVIEW is already aware of. Click “Browse” in the upper right hand corner, browse to where you saved your project and DLL, and open the DLL. LabVIEW will then present you with a dialog that displays the objects available in the namespace. Select the “MyMath” constructor we created. You now have a “Constructor Node” on the block diagram that points to you “MyMath” class.


Now we need to add an “Invoke Node” so that we can call our MyCos function. Place an Invoke Node on the block diagram and then wire it up to the MyMath Constructor Node. You’ll notice the text of the Invoke Node is black, this represents that we’ve not yet selected a method. Click on it once and select the “MyCos” method. We’re now presented with the input argument on the left and the output on the right.

Now let’s add a control for the input and an indicator for the output. Right click on each side, on the left choose “Create Control,” on the right choose “Create Indicator.”

The last thing we need to do is dispose of our reference to the class. Place a “Close Reference” block from the .NET palette on the diagram and wire it up to the right of the Invoke Node.
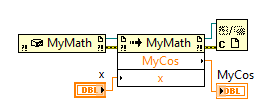
Now flip to the Front Panel “Ctrl-E” and arrange your controls and indicators. Here’s ours:

Now we’re ready to run the code! Enter a value for X and press run! When we run with “x” as “0″, we get back “1″ from the MyCos function as expected.
Now that our basic example is working, it’s time to close this tutorial. We hope this tutorial gave you a basic insight to interfacing C# and LabVIEW, and that you can use it as a starting point for building applications that do something interesting.
If you are in need of LabVIEW consulting, you can purchase a small set of hours right on our website. Learn More
Authors:
Kenneth Miller
Co-founder and Design Engineer – CLD – ken@erdosmiller.com
Nathan Hartman
Software Developer – nathan@erdosmiller.com


