

1. Introduction
Eclipse Touch has support for integrating with multiple automatic survey corrections providers. When configured, Eclipse Touch will seamlessly transmit your raw surveys to the provider and retrieve the corrections for display directly in Eclipse Touch.
2. Setup Instructions
Begin by opening Eclipse Touch and setting up your well. Once the well is set-up, click on the top half of the toolface dial where it states [Click to Configure Well/Run].
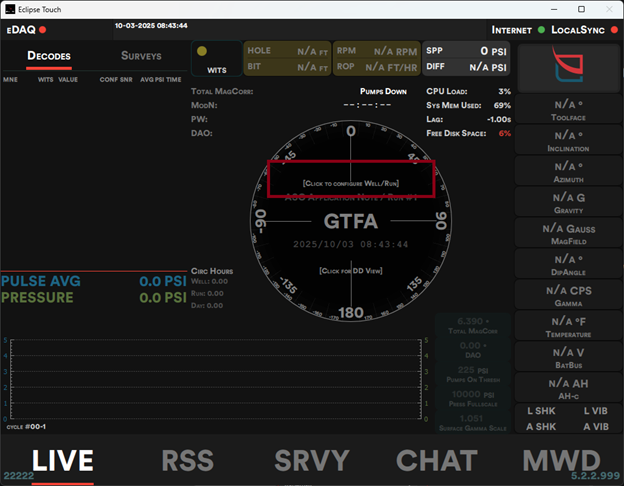
Figure 1 - Well/Run Configuration Access Button
The well/run configuration dialog will appear on screen. Click on the Srvy Corr tab on the left to bring up the survey corrections settings.
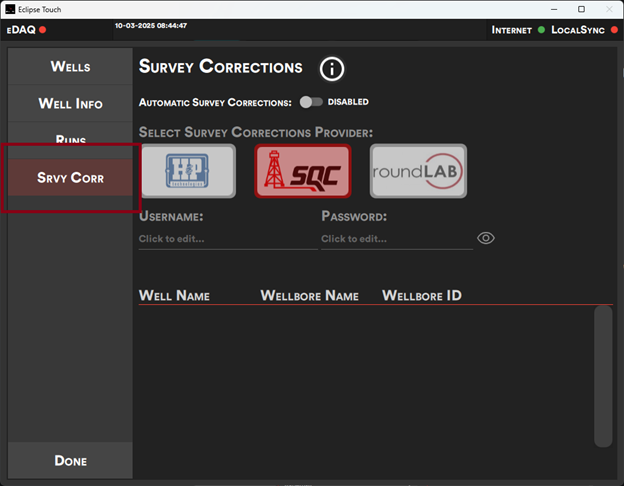
Figure 2 - Survey Corrections Tab
Click the Automatic Survey Corrections switch to enable ASC, click on the logo of your corrections provider, then enter the username and password given to you by the provider. You can click the eye icon next to the password field to reveal the password to ensure it is typed correctly.
When everything is entered correctly, click the Fetch Wells button to generate a list of available wells.
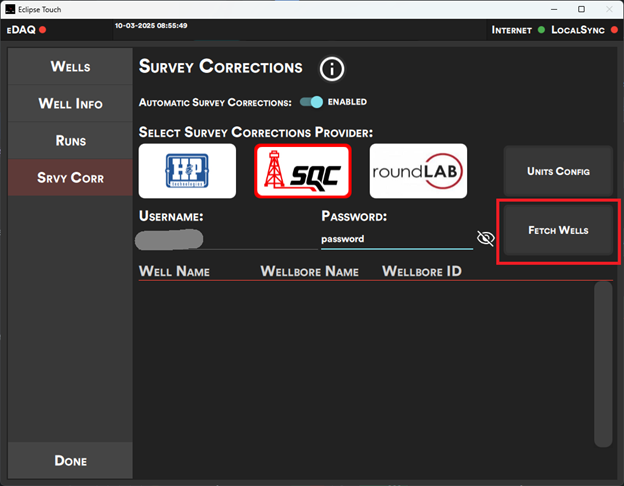
Figure 3 - Fetch Wells Button
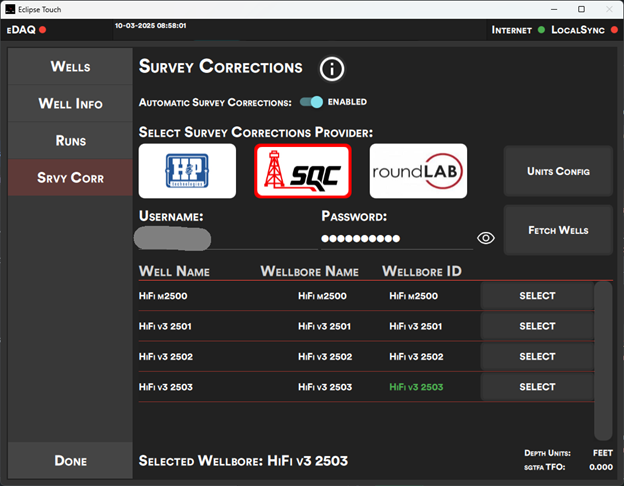
Figure 4 - Wellbore Listing with "Select" Buttons
Click on the Select button next to a well to set it as the active well. You will be asked to enter the SGTFA Toolface Offset. Type in the correctly value, and click “Set”.
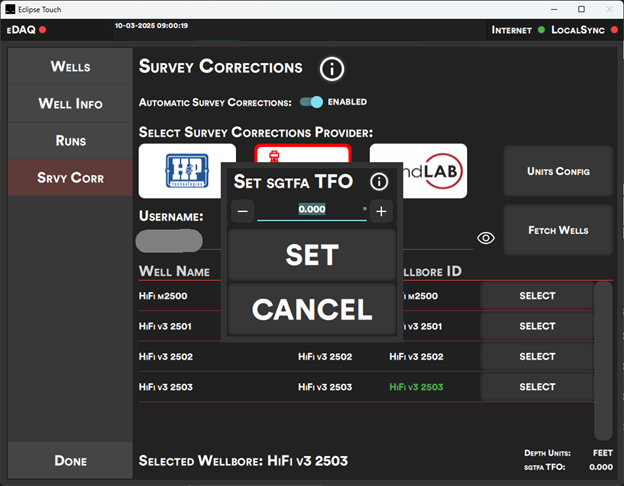
Figure 5 - SGTFA TFO Setting
You may now click Done and exit the screen. On the survey tab, you should see “ASC Logged In” in the top row.
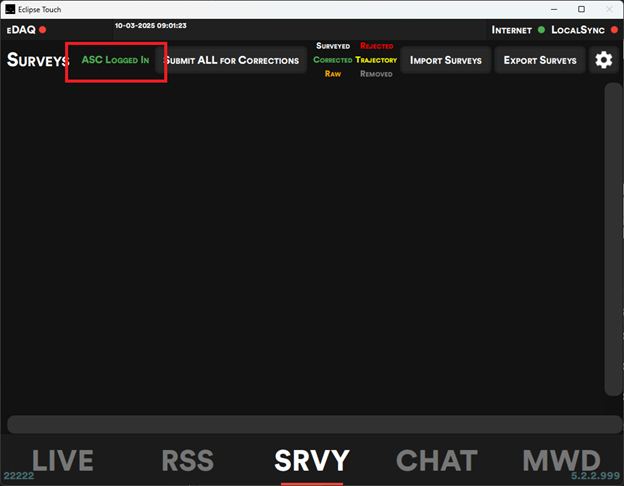
Figure 6 - Survey Tab - Connected Label
3. Utilizing Corrections
When a survey is fully decoded (all 6-axis data has been decode), the “Survey Complete Popup” will appear on screen. Enter the correct depth if the one displayed is incorrect, and mark the survey with the correct type.
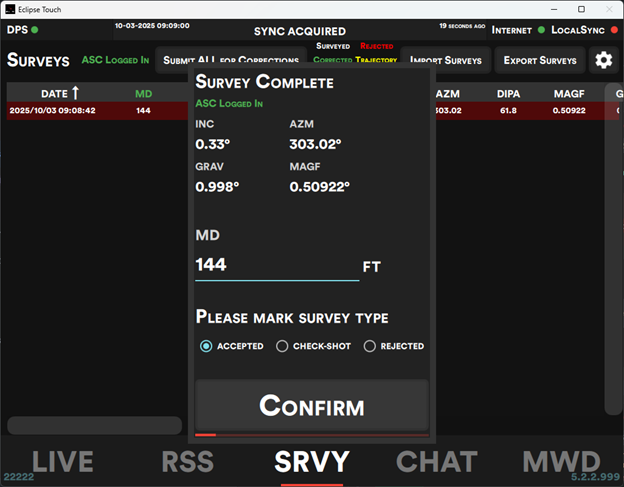
Figure 7 - Survey Complete Popup
After clicking “Confirm”, the survey will automatically be sent to the corrections provider for review. Eclipse Touch will check with the corrections provider every 10 seconds for the corrected information.
As Eclipse Touch receives responses from the corrections provider, the survey table will be updated to reflect the status of each survey:
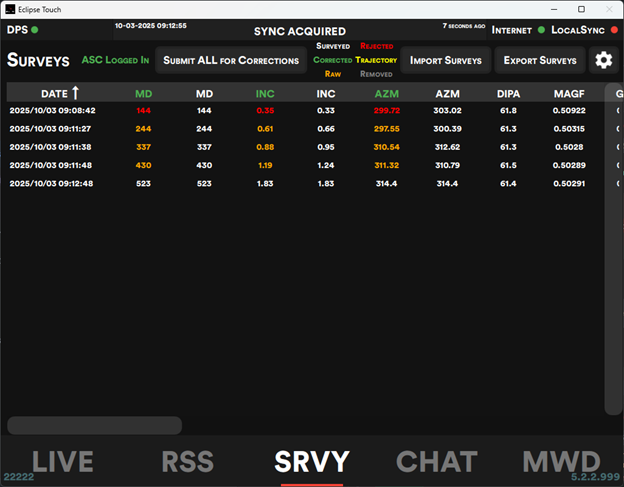
Figure 8 - Survey Table Listing With Colors
The color coding is listed in the top bar of the survey table. Only green represents corrected surveys.
Figure 9 - Survey Table Listing with Corrections
Note: Each provider has different criteria for beginning survey corrections. Most providers require at least 4 surveys before corrections begin, with other providers having additional criteria on top of that.
4. Manual Survey Submission
Users can manually submit surveys for corrections. This is useful when a survey’s depth has been edited and needs a new correction. To manually submit a single survey for corrections, click/touch the survey in the table and select “Submit for Corrections” in the pop-up menu.
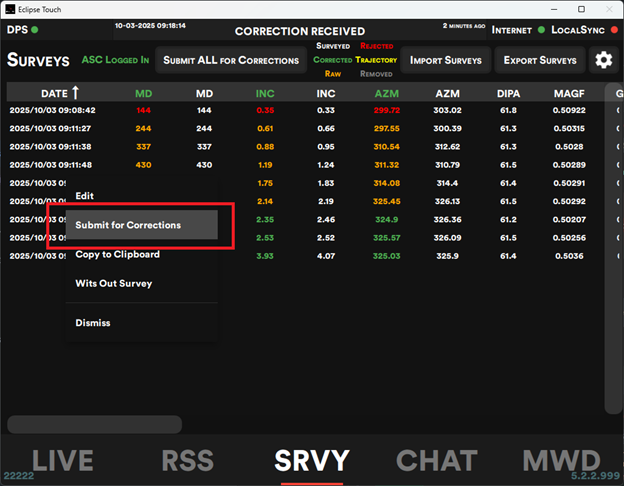
Figure 10 - Survey Table - Manual Submission
Users can also submit all surveys for corrections at one time. This is useful when survey corrections are configured AFTER surveys have already been decoded. To do so, click the “Submit ALL for Corrections” button at the top of the survey table.
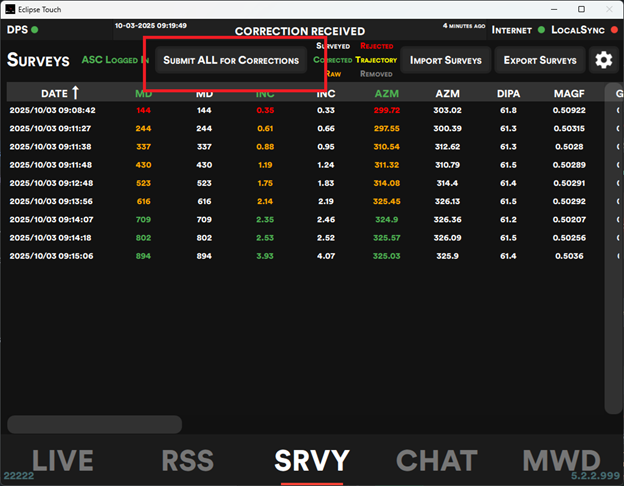
Figure 11 - Survey Table - Submit ALL For Corrections
Author

John Amstadt - Software Developer
REQUEST PDF