Several members of the Erdos Miller team attended National Instruments NIWeek 2016 Aug.1-4. In this post as well as a later companion post, we’ll share the most useful/interesting information we learned at conference sessions.
Session: Designing Attractive and Effective User Interfaces (UIs) in LabVIEW
Summary from: Sri Harsha Atluri, Electrical Engineering Lead | CLA, CLED
Always a popular topic among LabVIEW users, this session covered different ways to optimize your UIs. With an effective UI, the user can more intuitively interact with the program, giving the user a good impression of the software and making their job easier.
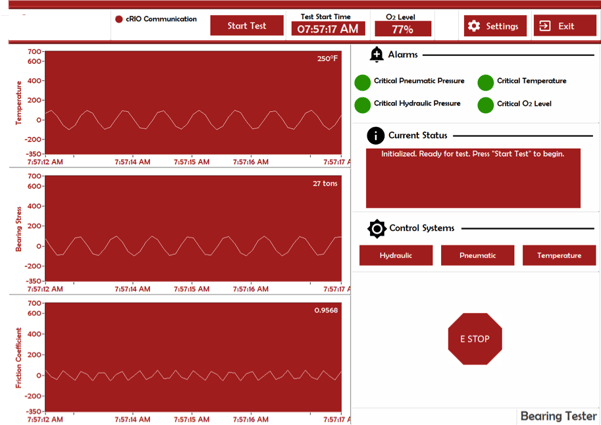
Flat UI from one of Erdos Miller’s Projects
Below are the top tips for designing effective UIs:
- Maintain consistency within the UI design, for example, in areas such as color schemes, the design and type of controls/ indicators and the types of symbols used.
- Keep the UI simple, clear and distinctive.
- Provide prompt feedback to the user by creating movement to show interaction with the application. This shows the responsiveness of the application, offers a fluid experience and shows that the program is doing something.
- Add color last. The simplest color to add is one - consider varying it by altering hue, saturation and/or brightness to get different shades of the color. Use the Adobe Color Wheel to create the color scheme.
- Remember, less is more - too much on the screen is distracting. By keeping your design clean and simple, you enable users to focus on what is important.
- Keep users in mind - they probably don't know as much as you do. Give clear instructions and forgive mistakes.
- Keep the software environment in mind as it will guide UI design principles:
- Where the software will run – a PC, Tablet or a small screen.
- Where the software will be used – indoors in low light conditions or outdoor in bright light.
- Stick to current UI design trends, such as flat UI, material design or card and tile design.
Session: DCAF - A Framework for Efficiently Developing Robust Control
Summary by: Sri Harsha Atluri, Electrical Engineering Lead | CLA, CLED
This session provided an overview of the new Distributed Control and Automation Framework (DCAF), an open-source framework developed by NI engineers for building robust, feature-rich control applications in less time by combining out-of-the box functionality and a configuration based workflow. This framework provides a powerful, scalable platform for developing control applications on NI embedded platforms.
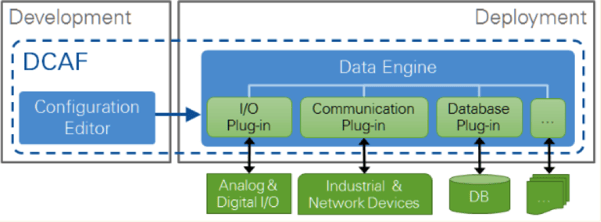
Visual overview of the DCAF framework
Some of the features of DCAF are:
- Configuration-based workflow
- Scalable and extensible plugin architecture
- Ability to define and configure plugin parameters
- Ability to reuse existing plugins
- Single-point I/O with processing and data services
- Rules for correct-by-construction software
- Ability to configure timing and error handling
- Optimized for real-time execution
Using the framework's built-in diagnostic capabilities, developers can efficiently track down errors.
DCAF advantages:
- Proven architecture from NI teams
- Scaling capabilities
- Open source
- Fast development time
- The framework automatically handles most of the common functionality, such as error handling and inter-module communication
DCAF drawbacks:
- Ramp-up time – a developer may need a few days to a few weeks to get up and running with the framework
- Software load and deployment times may be slow
- EXE build issues can be common, so users need to leave time at the end to deal with such issues
For more information on DCAF, visit ni.com/dcaf , where NI has set up a robust community site with content such as tutorials and case studies as well as an active discussion board.
Session: Building Your Own Kernel and Modules
Summary by: Antionio Alexander, Senior Integration Architect | CLA, CLED
This session was RSVP-only, and geared towards very technical users who were already modifying the kernel or were interested in writing drivers. It provided a step-by-step walk-through of why and how you may want to recompile your NI Linux Real-Time Kernel.
Reasons to not modify the kernel:
- You need to add a new daemon/library
- You need to modify the startup application
- LabVIEW needs access to non-NI hardware
Reasons to modify the kernel:
- To enable/add additional in/out of tree driver
- To enable new kernel-wide functionality (e.g., enable kernel debugging)
- To add a user-created driver
- To debug kernel issues
Although it’s not an easy process for a beginner, by modifying the kernel you can take advantage of the fact that LabVIEW runs on top of a Linux kernel that has a myriad of features, libraries and functionality to enable and use. During the session, the speaker was able to recompile the kernel to add drivers for a USB sound card (which looked like a Beats Pill) to which he was able to play music to from a LabVIEW VI.
Additional resource for Kernel development:
- NI Linux RT Community -https://decibel.ni.com/content/groups/ni-linux-real-time
- Exercise on working with the Linux Kernel -https://decibel.ni.com/content/docs/DOC-48483
In part 2 of our NIWeek recaps, we’ll cover sessions on XNodes, dynamic FPGA interfaces, integrating C/C++ and LabVIEW on NI Linus Real-Time embedded hardware, and an in-depth look at the IEEE 802.11ax wireless standard.